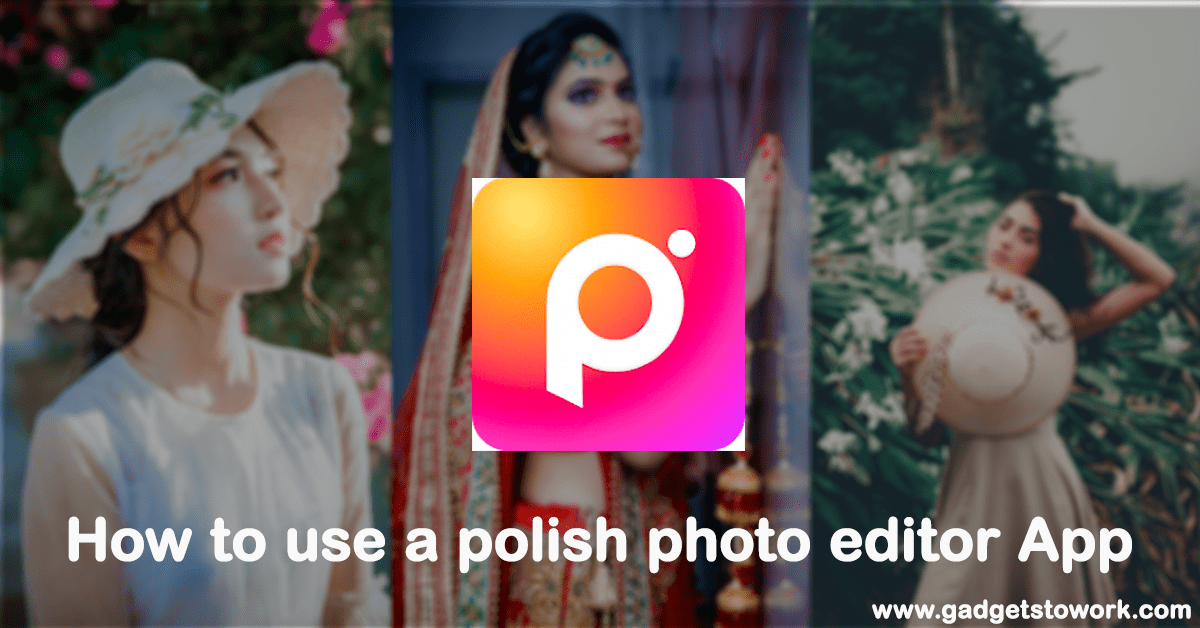
Hello! Are you interested in becoming a professional photo editor? With the right tools, you can transform any photo into something truly beautiful. Today, I’ll be discussing the Photo Editor Polish app—how it works, how to use its tools, and what makes it special. In this article, I’ll provide an overview of the app and its features, along with some helpful tips. I encourage you to read the entire article and share your thoughts in the comments!
If you’re looking for photo editing options, you can search for terms like “free photo editor,” “Polish photo editor online,” “best free photo editing apps,” “free photo editor app,” or “top photo editing app for Android.” In this article, I’m introducing you to the Polish Photo Editor app.
The app offers both free and paid versions. While the free version includes some tools, the premium version unlocks additional features. But don’t worry—you can still create stunning photos with the free version!
How to download polish photo editor Pro application ?
1 ) Simply go on Google Play Store and search the Polish Photo Editor Pro. Now install the application.
About the app :
| Application name | Photo Editor Pro Polish |
| Released On | Apr 23, 2018 |
| Version | 1.395.116 |
| Offered By | InShot Inc. |
| Downloads | 100,000,000+ downloads |
| Required OS | Android 5.0 and Up |
| In-app purchases | $0.99 – $15.99 per item |
How to use polish photo editor app Features ?
First open the application.
Then on the screen of your mobile you will see three options like photo, collage, and camera.
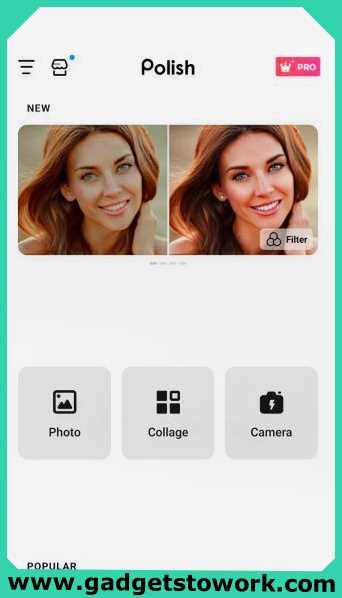
Then click on the photo option.
After selecting the photo, a new screen will open. You will find all the tools at the bottom.
What is the use of all tools and how you can edit your photo using tools. This article briefly details all of the tools. I guarantee you will find it easy to use all the tools. Because I have explained all the tools from the area.
Now introducing the tools. They have a total of 17 tools available in polish photo editor app.
Tools :
- Crop – Crop, Transform, Rotate, Vertical, Horizontal
- Filter
- Adjust
- Effect
- Beauty
- Remove
- Fit
- Text
- Sticker
- Blur
- Add
- Draw
- Enhancer
- Double Exposure
- Cutout
- Mirror
- Body
Now introducing the Total 17 tools are uses photo editing.
- Crop – Crop, Transform, Rotate, Vertical, Horizontal
Just Click on Crop Option and show the Crop, Transform, Rotate, Vertical, Horizontal. now click the Crop and Bottom you show the different size. Where,
iG 1:1. iG 4:5, insta Story, Movie, 5:4, 3:4, 4:3, Facebook Post, Facebook Cover, Pinterest Post, 3:2, 2:3, 9:16, 16:9, Mobile Screen, 1:2, YouTube Cover, Twitter Post, Twitter Header, A4, A5.
You can crop the photo to that size using all of the above formats.
Tips : Size 9:16 is perfect for WhatsApp status.
Transform – Choose the transform option.
Then, Now see you two options X and Y.
X – Change horizontal effect will be seen on left and right side.
Y – Change in vertical effect will be seen on top and bottom side.
Rotate – Useful for rotating photos.
Vertical – Useful for rotating photos vertically.
Horizontal – Useful for rotating photos horizontally.
- Filter
Click on filter option. Then three options will be seen.
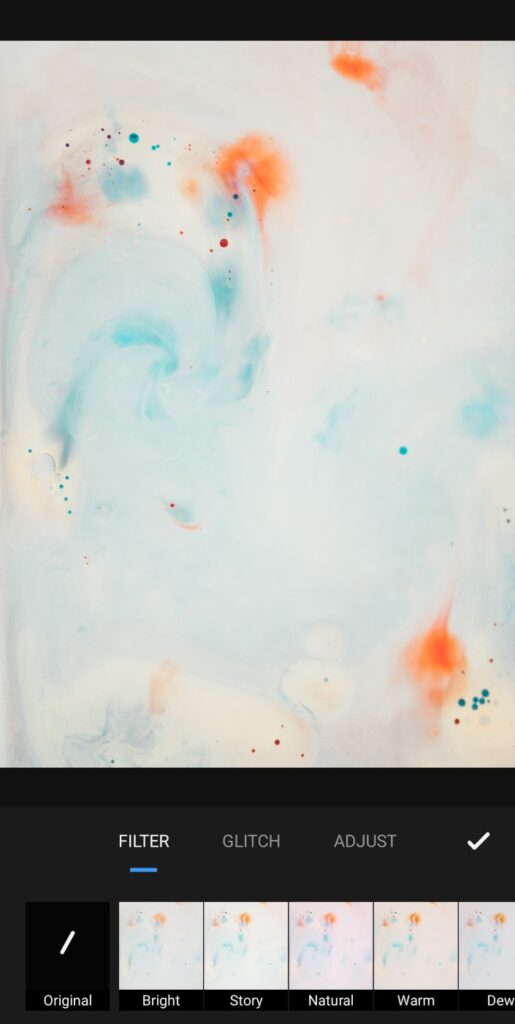
Filter, Glitch, Adjust
Choose the filter option and you seen the already available filters presents.
Filters :
Free Version : Bright, Story, Natural, Warm, Dew, Gold, Lomo, Pink, Ginkgo, Vintage, Memo, Latte, Time, Dark, Etc. You can use all these effects for free.
Paid Version : Sk-1, sk-2, sk-3, sk-4, S-1,S-2,S-4, AE-1, AE-2, AU-1, AU-2, AU-5, FL-1, Etc. You can use all these effects for paid.
Glitch : Some glitch effects are free and paid version available.
Free Version : RGB, RB, GB, Glitch, RG, Neon, Negative, Emboss, Swirl, Pixel, Fisheye.
Paid Version : Aberration, Radial, TU VHS, Chopped, Scaline, Monitor, Etc.
Adjust : Click On the effects and adjust the effect according to the photo
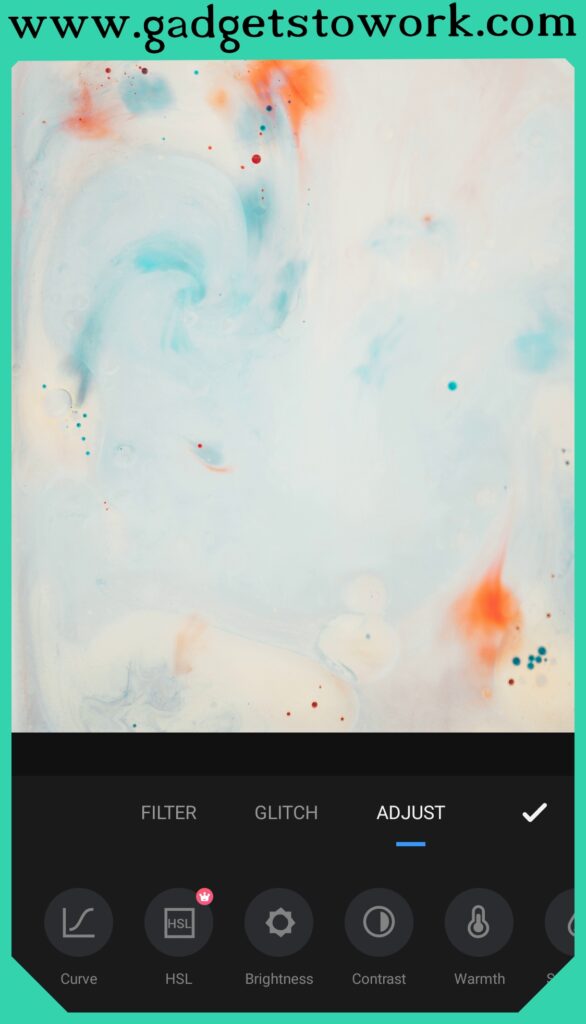
Curve, HSL (Paid Version), Brightness, Contrast, Warmth, Saturation, Fade, Highlight, Shadow, Tint, Hue, Vignette, Sharper, Grain Effects Are Easy to Apply in images.
- Effect
Click On Effects. Then you will see different effects like Light Fx, AI Cartoon, Neon, Drip, Cartoon, Overlay, Splash, Background, Sketch, Motion on your screen.
Now apply to above the effects. Some effects examples show here.
Examples :
Photo created using Light FX Effects.
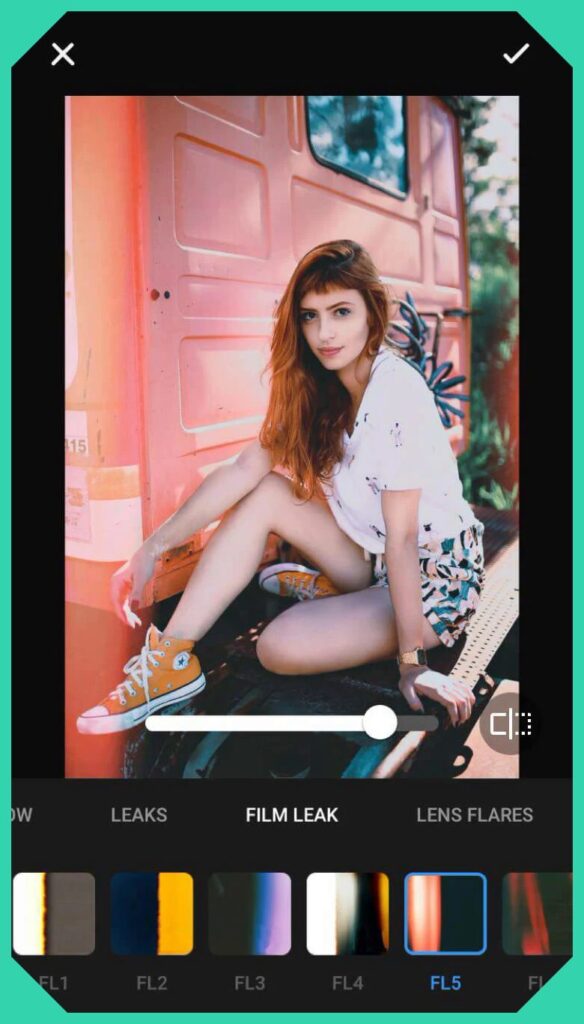
Photo created using Cartoon Effects.
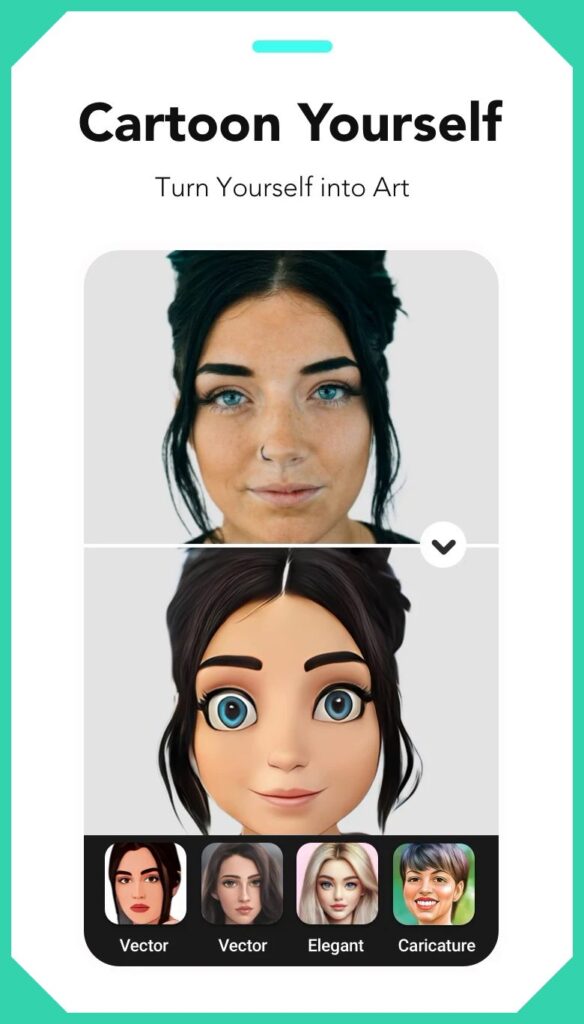
Photo created using background effect.
- Beauty
Click on “Beauty,” and you’ll see multiple options available to enhance your photo:
- Retouch
- Face
- Blemish
- Wrinkle (Available in the paid version)
- Dark Circle (Available in the paid version)
- Reshape
- Retouch
Smooth, Whiten, Sharpen
When you open the Retouch option, you will see three options, Smooth, Whiten, Sharpen.
A Slider will be found on the upper side of Options.
You can adjust Smooth, Whiten and Sharpen effects on the face according to your photo by using Slider.
- 2. Face
Click It.
You will see many options in front of you.
1) Face, 2) Eye, 3) Lips, 4) Nose, 5) Eyebrows
You can adjust your face using all the effects given above.
All the effects can be easily adjusted in the same way as the face.
Many options are given below all options. Using which you can increase or decrease Face, Eye, Lips, Nose, Eyebrows according to your photo. For them, a slider is provided above the options through which you can adjust.
Face : Thin, Width, Jaw, Forehead
Eye : Size, Width, Distance, Height, Tilt
Lips : Size, Width, Height, Thickness
Nose : Size, Width, Tip, Lift
Eyebrows : Thickness, Distance, Lift, Tilt.
- 3. Blemish
Useful for removing blemishes on faces inside your photos.
Click Blemish Option uper to remove face blemish.
After that, you will see Tap areas to remove blemishes written on the lower side. That means click on the face where there is a scar.
Clicking on a blemish in a photo will remove the blemish and help you beautify your photo.
- 4. Wrinkle (Paid Version)
This function can be used in paid version only.
Helps to remove wrinkles that appear on faces in your photos.
- 5. Dark Circles (Paid Version)
This function can be used in paid version only.
With the help of this option, it helps to remove the dark color circles seen in the under-eye area in photos.
- Remove
Useful for removing extra objects from the photo.
Inside which 2 options are found.
- Remove Object
- Recovery
Remove Object :
Touch the screen on the place where the object is to be removed. After that, wait for some time. You can see that extra object is successfully removed from your photo.
Slider will be found on top of Options. By whom you can adjust the size of the brush.
Recovery :
Remove Object is useful to recover the objects that have been removed.
- Fit
It is useful to determine the Size, Background, Border and Position of the photo. Which you can adjust according to your photo.
Click on the Fit option.
After that four options will be seen at the bottom. Such as, Ratio, BG, Border, Position.
Ratio : Useful to determine the size of the photo.
You will find many sizes here. For example, there are different sizes for WhatsApp, Instagram, Twitter and YouTube. You can select the size according to your photo from it.
Tips: Keep the ratio of 9:16 for WhatsApp Status.
- BG : From here you can set the background of the photo.
Note: In BG you will find an option called custom. Click on which you can set your favorite background image.
BG>Custom>Choose Photo from Gallery>That Set.
Border : Useful to give your favorite border to your photo.
Two types of options Color and Style will be found on the top side of Options.
Color : Border color of the photo can be set from here.
Style : Many styles have already been made available. You can select them to create borders of your photo in different styles.
Note : Many styles are made available here in free and paid styles.
- Position
It is useful to determine the position of the photo.
Slider is provided at the top to determine the position. You can set the photo position through them.
- Text
Useful for adding Text inside the photo.
Open text option.
Now, a new screen will be opened. In which you will see Type Something written, touch it there.
Now type the text to be added inside your photo.
After writing the text, you will see a sign of Right in the upper right corner.
Click there.
Then you will see many options below.
Such as, Keyboard, Font, Color, Edit and Curve.
Keyboard : Useful for editing the text.
Font : Click on Font option.
Now, See their many font style and effects.
In which some text effects will be useful in Paid Version only. Select the font which you like.
Color : This option can be used to color your selected text.
Text border color can also be changed from here.
Edit : With the help of this option, effects like Shadow, Degree, Character, Line can be used in Text.
Curve : Your text can be given a curve.
Select the Curve option to give the Text a Curve. Then Slider will be provided on the bottom side.
Curve can be adjusted through them.
- Stickers
This option is used to add different types of Stickers or Emojis within the photo.
- Blur
Used to blur background inside photos.
In which there are many Blur samples. Such as, Blur, Circle, Linear, Radial, Motion, and Zoom.
Note: Adjust Blur according to your photo. Excessive blur reduces the beauty of the photo.
Slider is provided above option to decrease and increase Blur. From there the Opacity of the Blur can be reduced and increased.
- Add
Helps upload more than one photo.
You can add any PNG, JPEG format in your photo.
When you click on the Add option, the Gallery will open. Select the photo to be added.
After selecting the photo, you will see six options down below.
Crop, Eraser, Filter, Vertical, Horizontal, Opacity
Opacity : Slider is useful for reducing the opacity of a photo.
Crop : The photo can be cropped. In which there are many size samples available. Choose the size from the sample.
Eraser : Can Erase Photo.
Note : Erase can only be done by selecting the second photo. This option will not be useful for erasing previous photo.
For the first photo, the Remove option will come in handy.
Filter : Many examples of Filters are given. Which you can use in a simple way.
Vertical and Horizontal : Photo can be arranged in vertical and horizontal way.
- Draw
Draw can be done with the help of Mosaic Effect and Magic Tool inside the photo.
Mosaic : Many effects are already made available within this option.
Choose effects according to your photo.
After that, draw on the place where you want to keep the effects in the photo.
Similarly colored drawing can be done with the help of Magic Tool.
Many styles have been made available for them too.
- Enhancer
It is especially useful to increase the quality of photos.
When you select the Enhancer option you will see three options in front of you.
1) Enhance
2) Colorize
3) Repair
By just one click on these three options, the effect will be applied in your photo.
Enhance : The Enhance option is used to increase the quality of the photo.
Colorize : Helps to make photos colorful.
Repair : This option is useful for repairing excessive effects inside the photo.
- Double Exposure
Double exposure is a technique that combines two different photos that appear layered on top of one another.
The overlaid image appears at less than full opacity.
After selecting the photo in Double Exposure, many effects are seen.
Normal, Multiply, Screen, Lighten, Darken, Overlay & Add.
Choose the effects according to your photo.
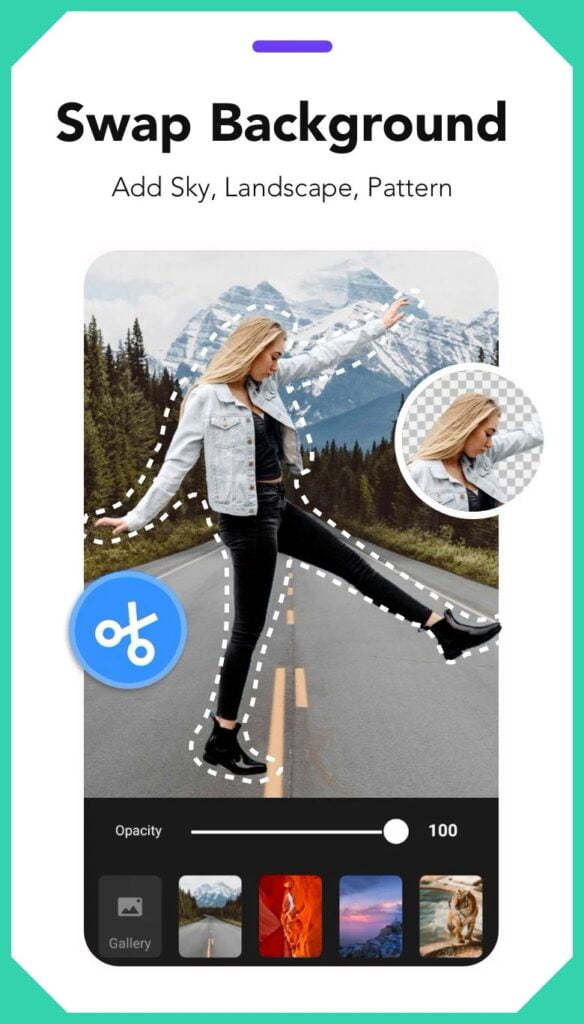
- Cutout
Background or other additional objects within the photo can be cutout.
It is also useful in removing background.
After selecting the Cutout option, two options will be seen in it.
1) Cutout, 2) Shape
Shape :
It is useful for giving shape to the photo.
In which there are many shape samples. Select the model that you like.
After that, you can easily make adjustments.
- Mirror
This option is used to create a mirror like effect within the photo.
Click on the mirror option.
Then, you will see two options in front of you.
1) 2D, 2) 3D
2D : Using the 2D option within the photo gives a mirror-like effect and shows two photos at the same time.
A lot of samples in 2D are already made available. Who can use it easily.
3D : Used to make photos 3D. In which many samples of 3D Effects are made available. Which you can use free.
- Body
With the help of this option, your body can be given shape.
In which every part of the body is well adjusted. You can easily use them.
How to Save Photos on Polish Photo Editor App
The Polish photo editor app provides two options for saving edited photos.
- Project File
- Image File
Save Photo as a Project File
Saving your photo as a project means that you save it as a work in progress. You can come back and work on the file later. Saving your photo as a project is a great way to ensure that you don’t lose any of your work if you need to take a break or if you need to come back and work on the file later.
To save your photo as a project :
- Click on the “Save Project” button in the top-right corner of the screen
- Choose a name for the project and click “Save.”
Save Photo as Image File
Saving your photo as an image file means that you export the edited photo as a image file that you can then use for printing or sharing. When you save your photo as an image file, you will have a many of file formats and quality options to choose from and then export your photo.
To save your photo as an image file :
- Click on the “Export” button in the top-right corner of the screen
- Choose the file format and quality that you want and click “Export”
Share Your Photo on Social Media
Once you have edited your photo and saved it as an image file, you can easily share it on social media. The Polish photo editor app makes it easy to share your edited photos on many platforms, including Instagram and Facebook.
To share your edited photo on social media :
- Click on the “Share” button in the top-right corner of the screen
- Choose the platform that you want to share the photo on
- Add a caption and any other details that you want to include
- Click “Share”
The Polish photo editor app offers users several different saving options to ensure that their edited photos are saved correctly.
Also Like :
How to use a lumii – photo editor app
How to Read WhatsApp Messages without Blue Tick
Conclusion
In this article, I have covered everything you need to know to use a Polish photo editor app. Whether you’re a beginner or an experienced editor, this guide will help you take your photo editing to the next level. However if you find any kind of error or have any query then comment and report so that everyone can get good information. Thank you.
FAQs :
Q.1 Are Polish Photo Editors Good for Professional-Level Editing?
Q2. Can I Edit RAW Photos Using A Polish Photo Editor App?
Q3. Are Polish Photo Editors only for Mobile Devices?
Compatibility : Windows 11, Windows 10, Windows 8.1, Windows 8, Windows XP, Windows Vista, Windows 7, Windows Surface Pro